Raylib in Swift
Swift is great, but if you plan on doing any real work with it, you'll need to interact with C/C++ code. I find that there aren't many great guides on how to incorporate a C library into a Swift project; specifically ones that provide a clear example and aren't overly complicated. That is why I decided to write this article.
To demonstrate how C code can be used from Swift I'll use the fantastic raylib library, which is relatively simple yet still provides a clear example. It's also important to note this tutorial specifically focuses on Xcode, how to do this manually is not something I cover here.
Obtain Raylib
First, we need to get the library we will be using. In my case I'll clone raylib from GitHub.
git clone https://github.com/raysan5/raylib.git
Next, we have 2 options:
- compile the library and generate a static binary file to include in our project,
- include the source code of the library directly in our project and compile them together.
In case of raylib we can go with option 1 because that is the easiest way. I'll include notes in appropriate sections in case the library of your choice expects to be compiled with your project. But back to option 1.
Raylib can be compiled by running:
cd raylib/src
cmake .. # generate make files
make PLATFORM=PLATFORM_DESKTOP # compile the library
This will generate a file named libraylib.a inside of raylib/src/raylib. This is the static binary file we will inlcude in our project.
Import files
Create a new project in Xcode using the command line tool template. Then, drag the libraylib.a file somewhere into the project; I placed it into a subfolder conveniently named raylib. If Xcode asks whether to add this file to your target, choose no (uncheck it from the add to targets list).
Next, we will want to go to Project Settings > Build Phases > Link Binary With Libraries and click the '+' symbol. Here choose Add Other > Add Files and locate the libraylib.a file.
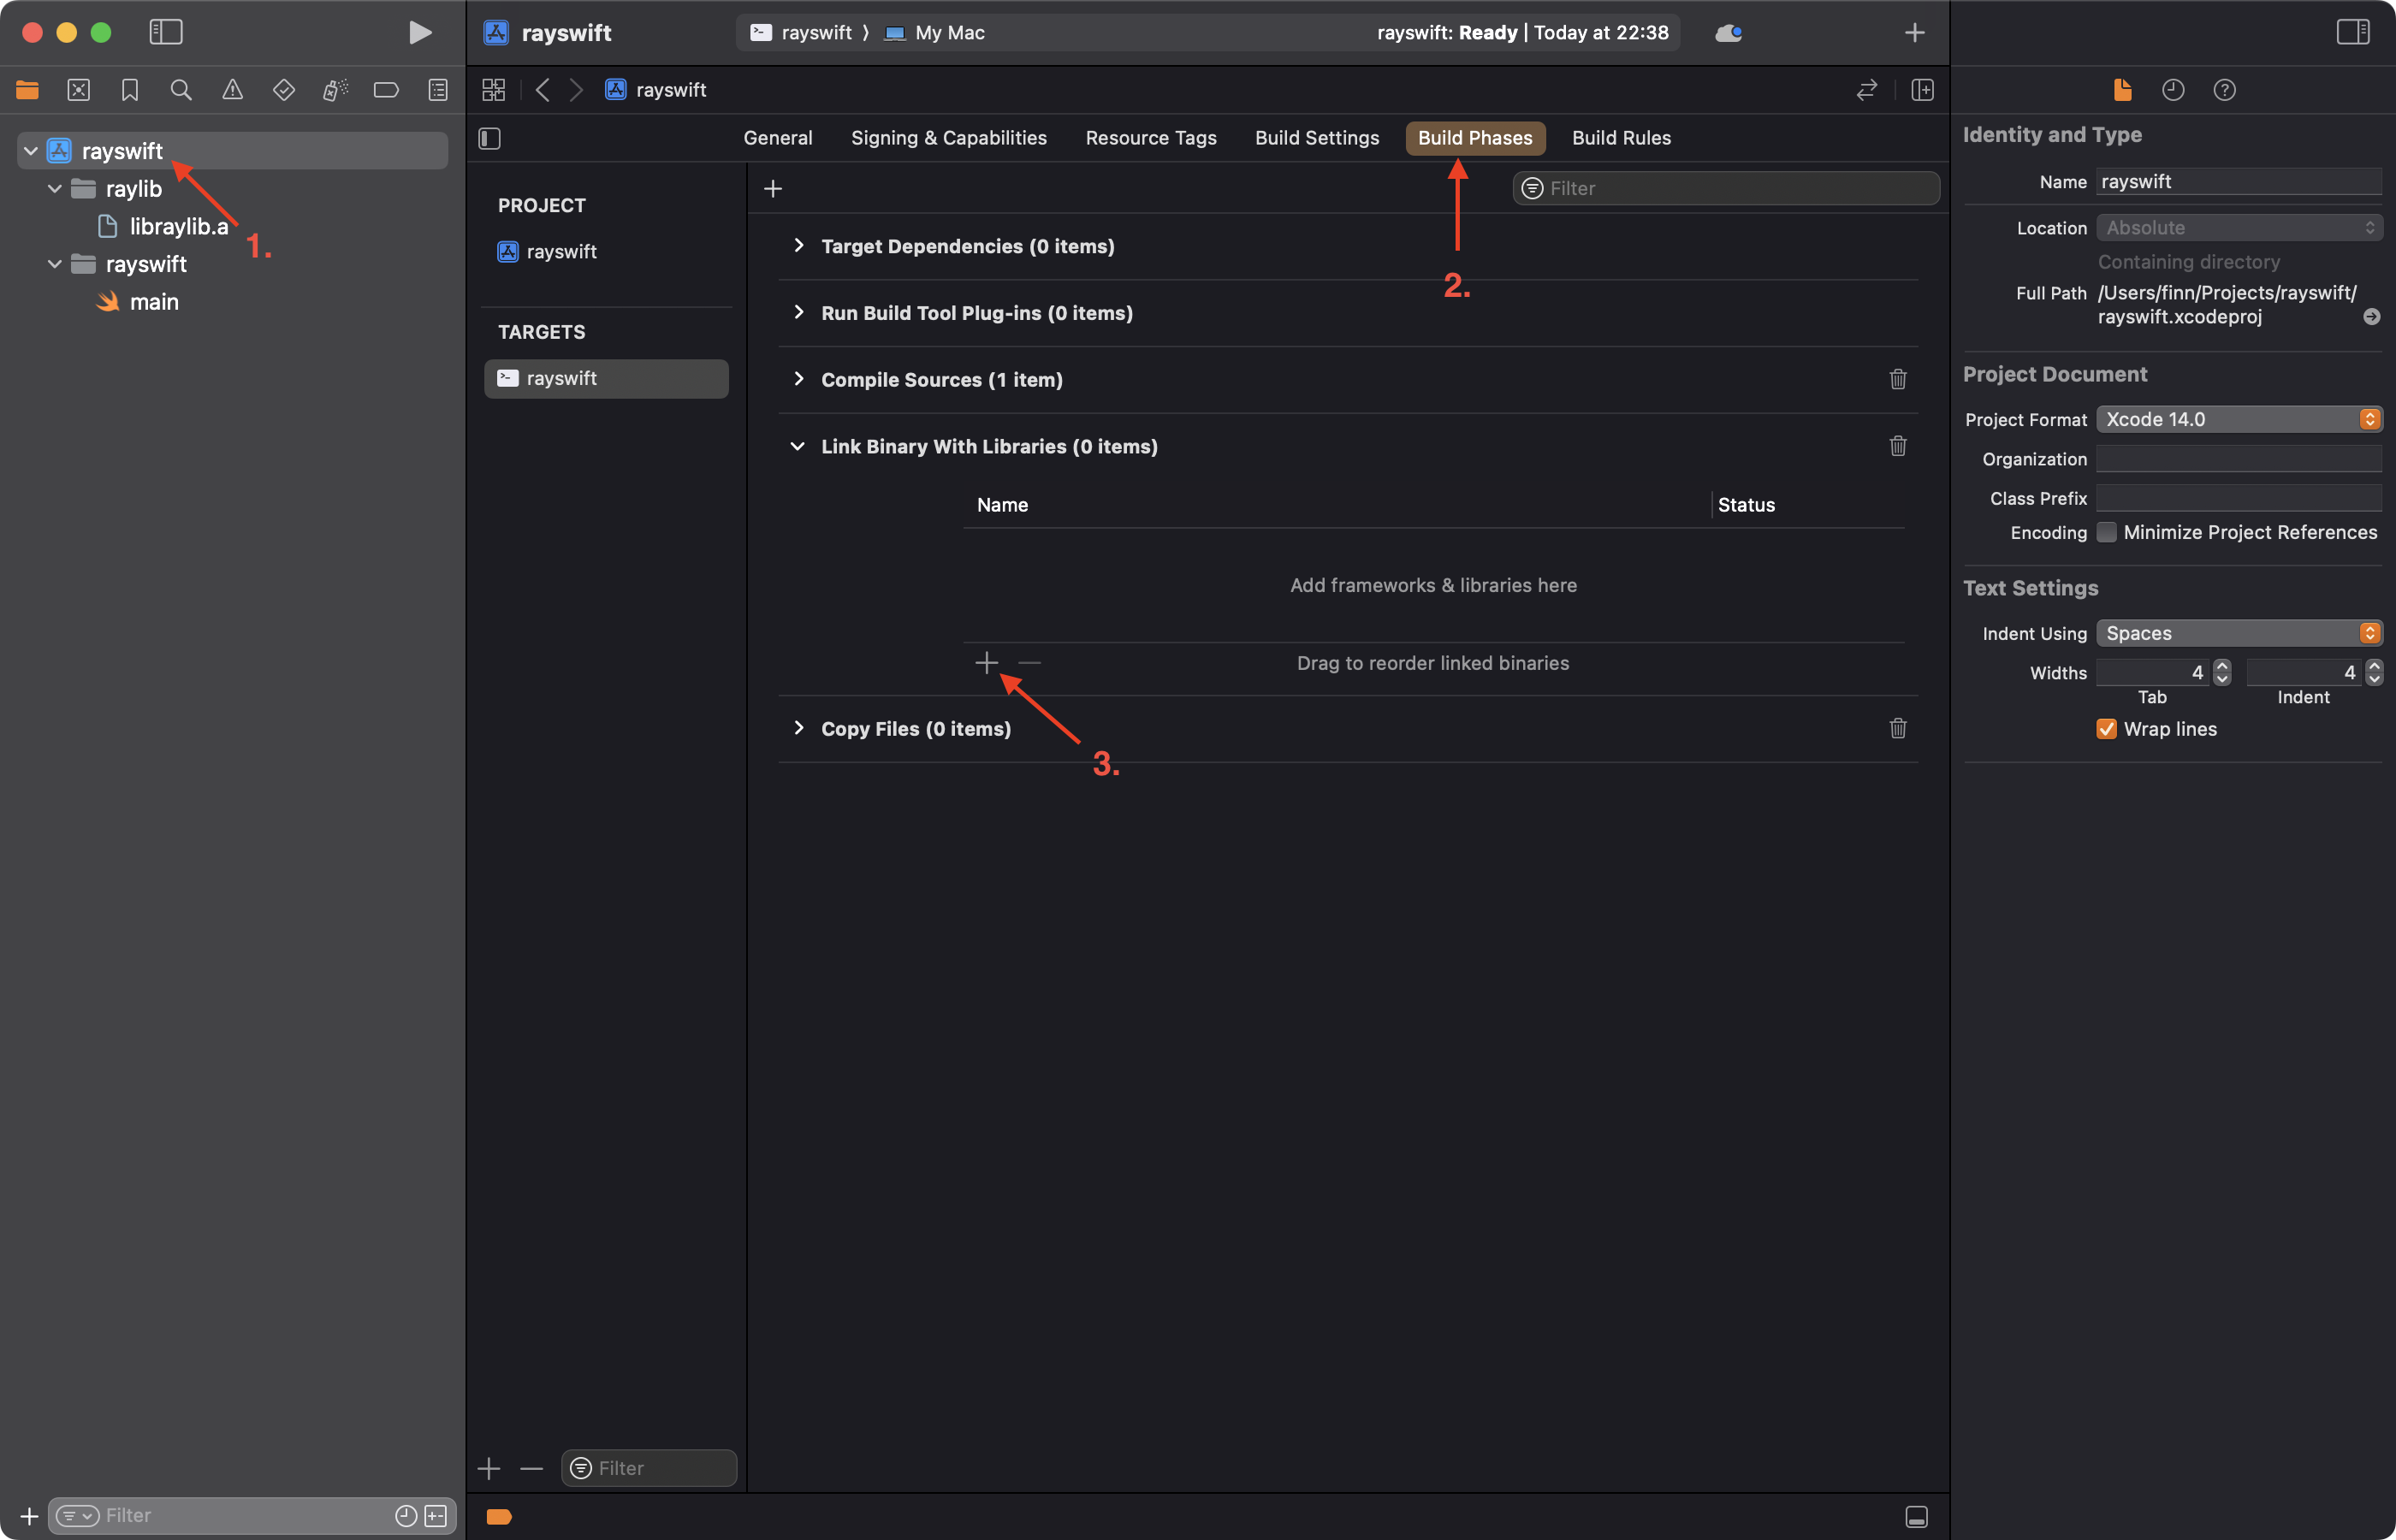
This will link our project with raylib during compilation. Because we are working with raylib, we will also need to add some system libraries for it to properly function. Click the '+' again and add these frameworks:
- OpenGL
- IOKit
- Cocoa
Next, we will want to add appropraite header files to our project. These are located in raylib/src/raylib/include. Drag them all in as you did with the .a file.
If you decided to go with option 2 earlier, here is a good place to add all source files into the project (all .h and .c files). Simply drag them in and make sure your target is checked in the add dialog, so that the files get compiled with the project. In case it also asks whether to create a bridging header, choose create. You will see how this is used later.
Add bridging header
For Swift to be able to see our C code, we need to create an Objective-C bridging header. Why Objective-C? Well, because Swift doesn't directly interact with C, rather it uses the Objective-C bridging header which defines what C code gets included. The easiest way to create this header is simply by creating a random C file (can be deleted later) which will trigger Xcode to ask whether we also want a bridging header.
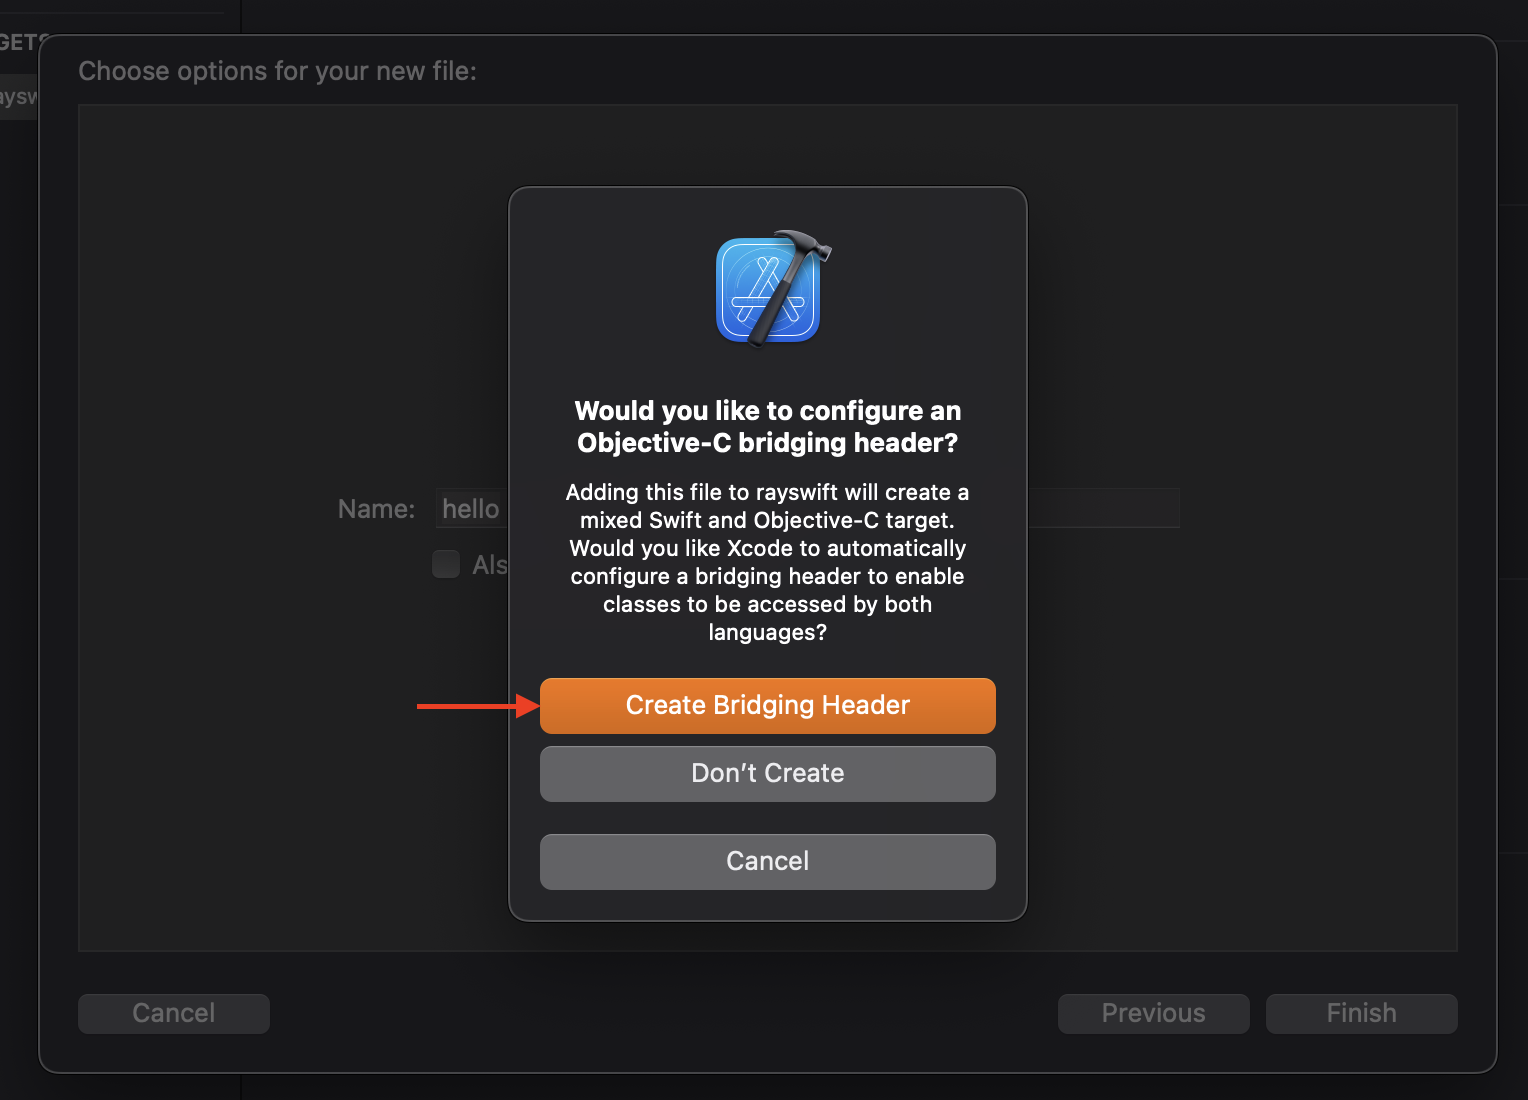
Choose create. This will add a file named [your-project-name]-Bridging-Header.h
Inside the bridging header, we include the headers we want to use:
// rayswift-Bridging-Header.h

#include "raylib.h"
In case of raylib that is, of course, raylib.h.
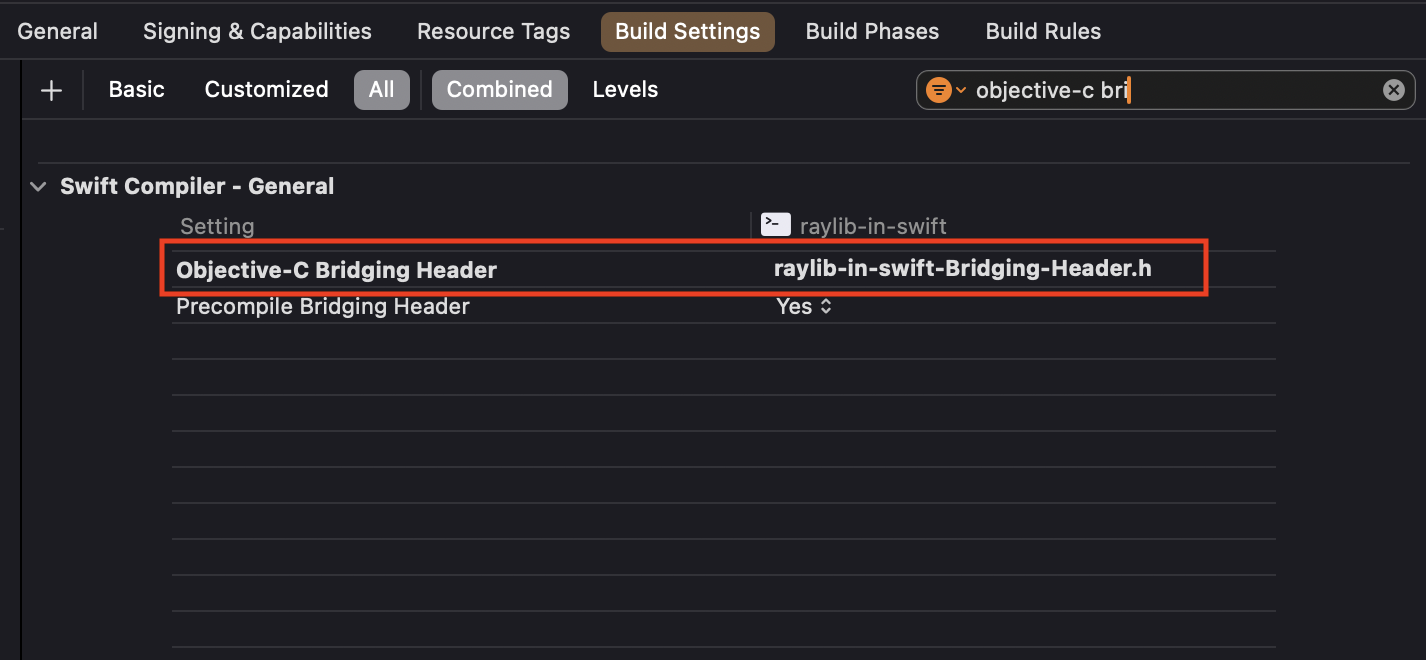
If for some reason Xcode didn't create the bridging header for you, you can specify the bridging header manually by going into Project Settings > Build Settings and searching for "Objective-C bridging header". Change it by setting this option:
Use raylib from Swift
And that's it! Now we should be able to use raylib in our Swift code. You don't import anything in your Swift file, C symbols are exposed to Swift through the bridging header. Here is a quick example...
// main.swift

SetConfigFlags(FLAG_WINDOW_HIGHDPI.rawValue)
InitWindow(600, 400, "Raylib in Swift")
SetTargetFPS(60)

while WindowShouldClose() == false {
    BeginDrawing()
    ClearBackground(Color(r: 20, g: 20, b: 20, a: 255))
    DrawText("Hello, World!", 10, 10, 24, Color(r: 255, g: 0, b: 0, a: 244))
    EndDrawing()
}

CloseWindow()
...which produces:
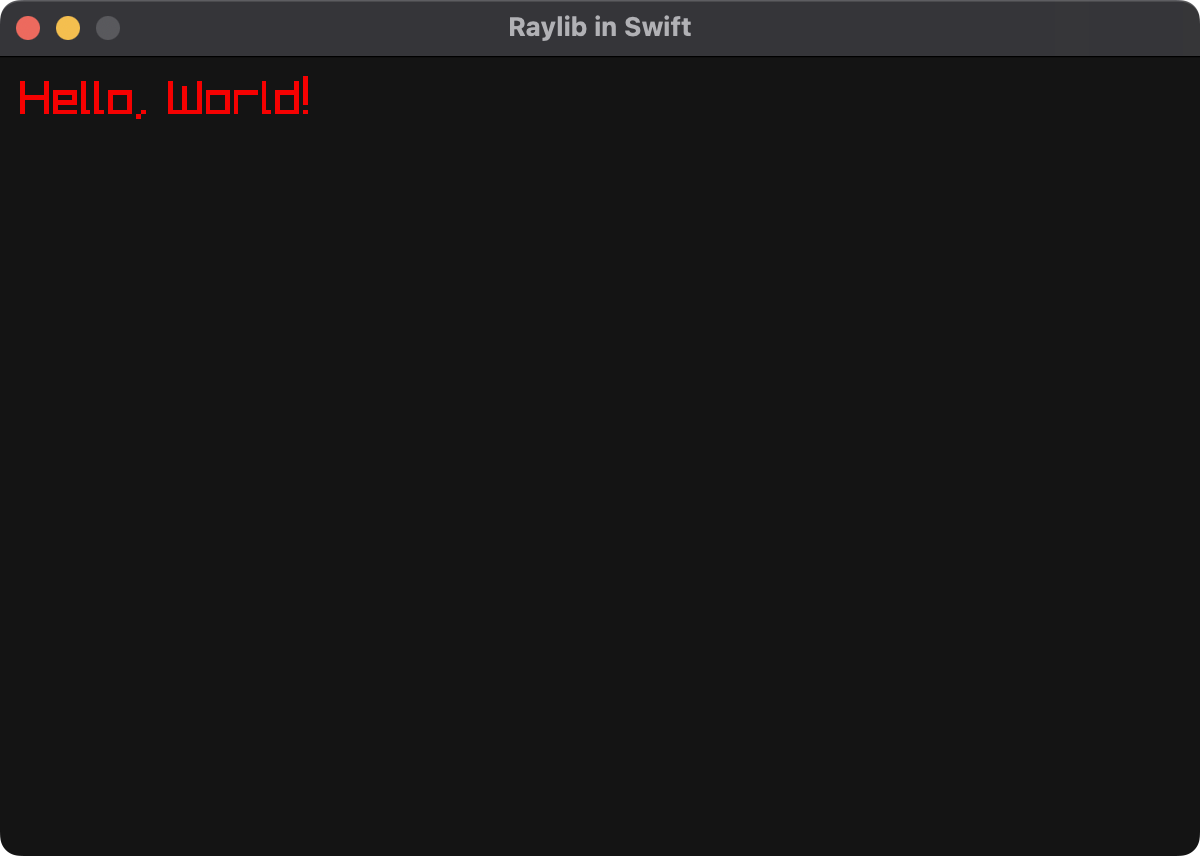
You can see here that Swift is automatically able to convert Swift types (such as Int or String) into appropraite C types. Swift also inteligently treats C function arguments as Swift named arguments, as can be seen with the Color() function. Now you can make anything you could with C, but with the power and comfort of Swift!
Additional notes
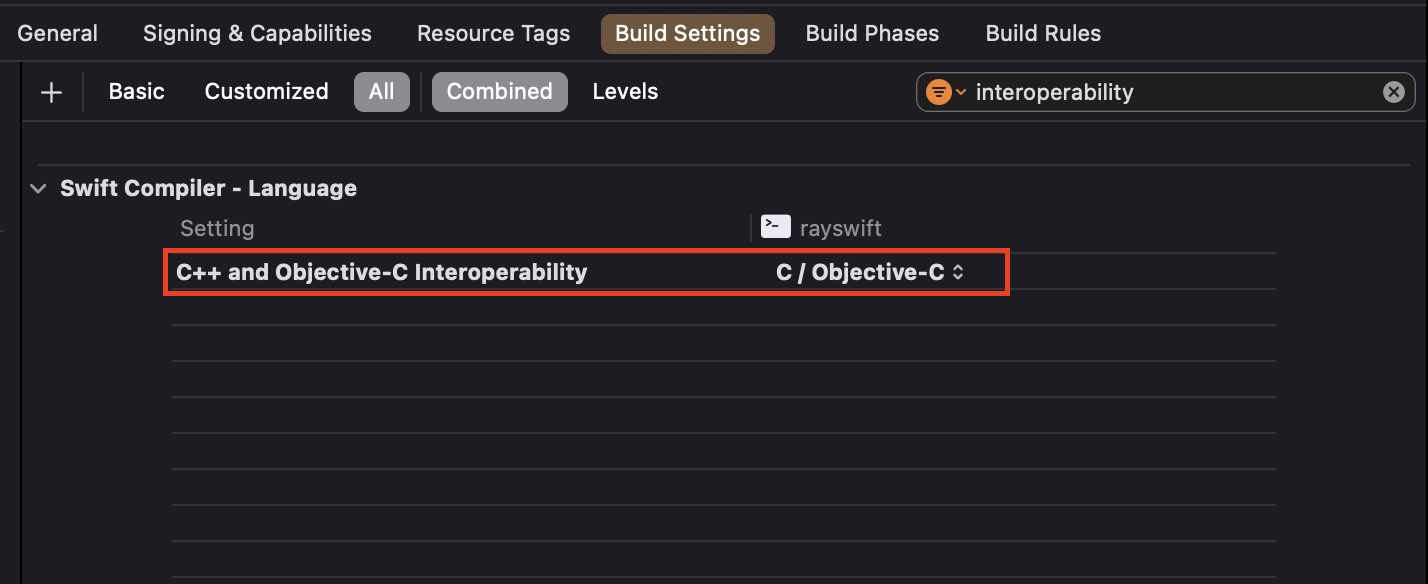
In case the library you decided to use is a C++ library, you'll need to change an additional option. Go to Project Settings > Build Options and search for "interoperability". Change the following setting to C++/Objective-C++.
Conclusion
I hope this article gave you a good example on how to use a C/C++ library with Swift. I am amazed at how convoluted Apple's documentation on this topic is, and why they can't just provide one simple example that focuses on their own tools (Xcode). Oh well, at least one exists now.
Thanks for reading!
